Creative programming is a field that has always fascinated me. I love shaders (love and hate), graphic effects, and generative art. Recently I started to play with Rust, (no, not this Rust 😅) and the programming experience really amazed me. Coming from the Android world where adding a new dependency may become a fight with Gradle, I was so pleased with the experience provided by Cargo. Adding a new library takes only a few lines and in a couple of seconds a project is up and running. Rust is also blazing fast and memory-efficient, making it a perfect candidate for graphics or heavy calculations. My excitement went through the roof when I discovered Nannou, a library written in Rust that aims to make it easy for artists to express themselves with simple, fast, and reliable code.
Nannou
Nannou is an open-source creative-coding framework for Rust. It’s under the MIT license and is cross-platform. The Nannou’s documentation is well-made with a clear explanation for each module, and there’s an extensive set of examples to get an idea of how Nannou applications are structured and how the API works.
Getting Started
The Nannou Guide provides all the steps to install Rust, Nannou, configure the editor (I chose Visual Studio Code), and run some Nannou examples.
The Nannou framework provides out of the box three collections of examples:
examples/A collection of examples with categorized demonstrations of Nannou.generative_design/Examples from Generative Gestaltung, ported from p5.js to Nannou.nature_of_code/Examples from Nature of Code, ported from Processing to Nannou.
To get the examples, clone the Nannou repository:
git clone https://github.com/nannou-org/nannou
From the nannou directory, run one of the examples using cargo:
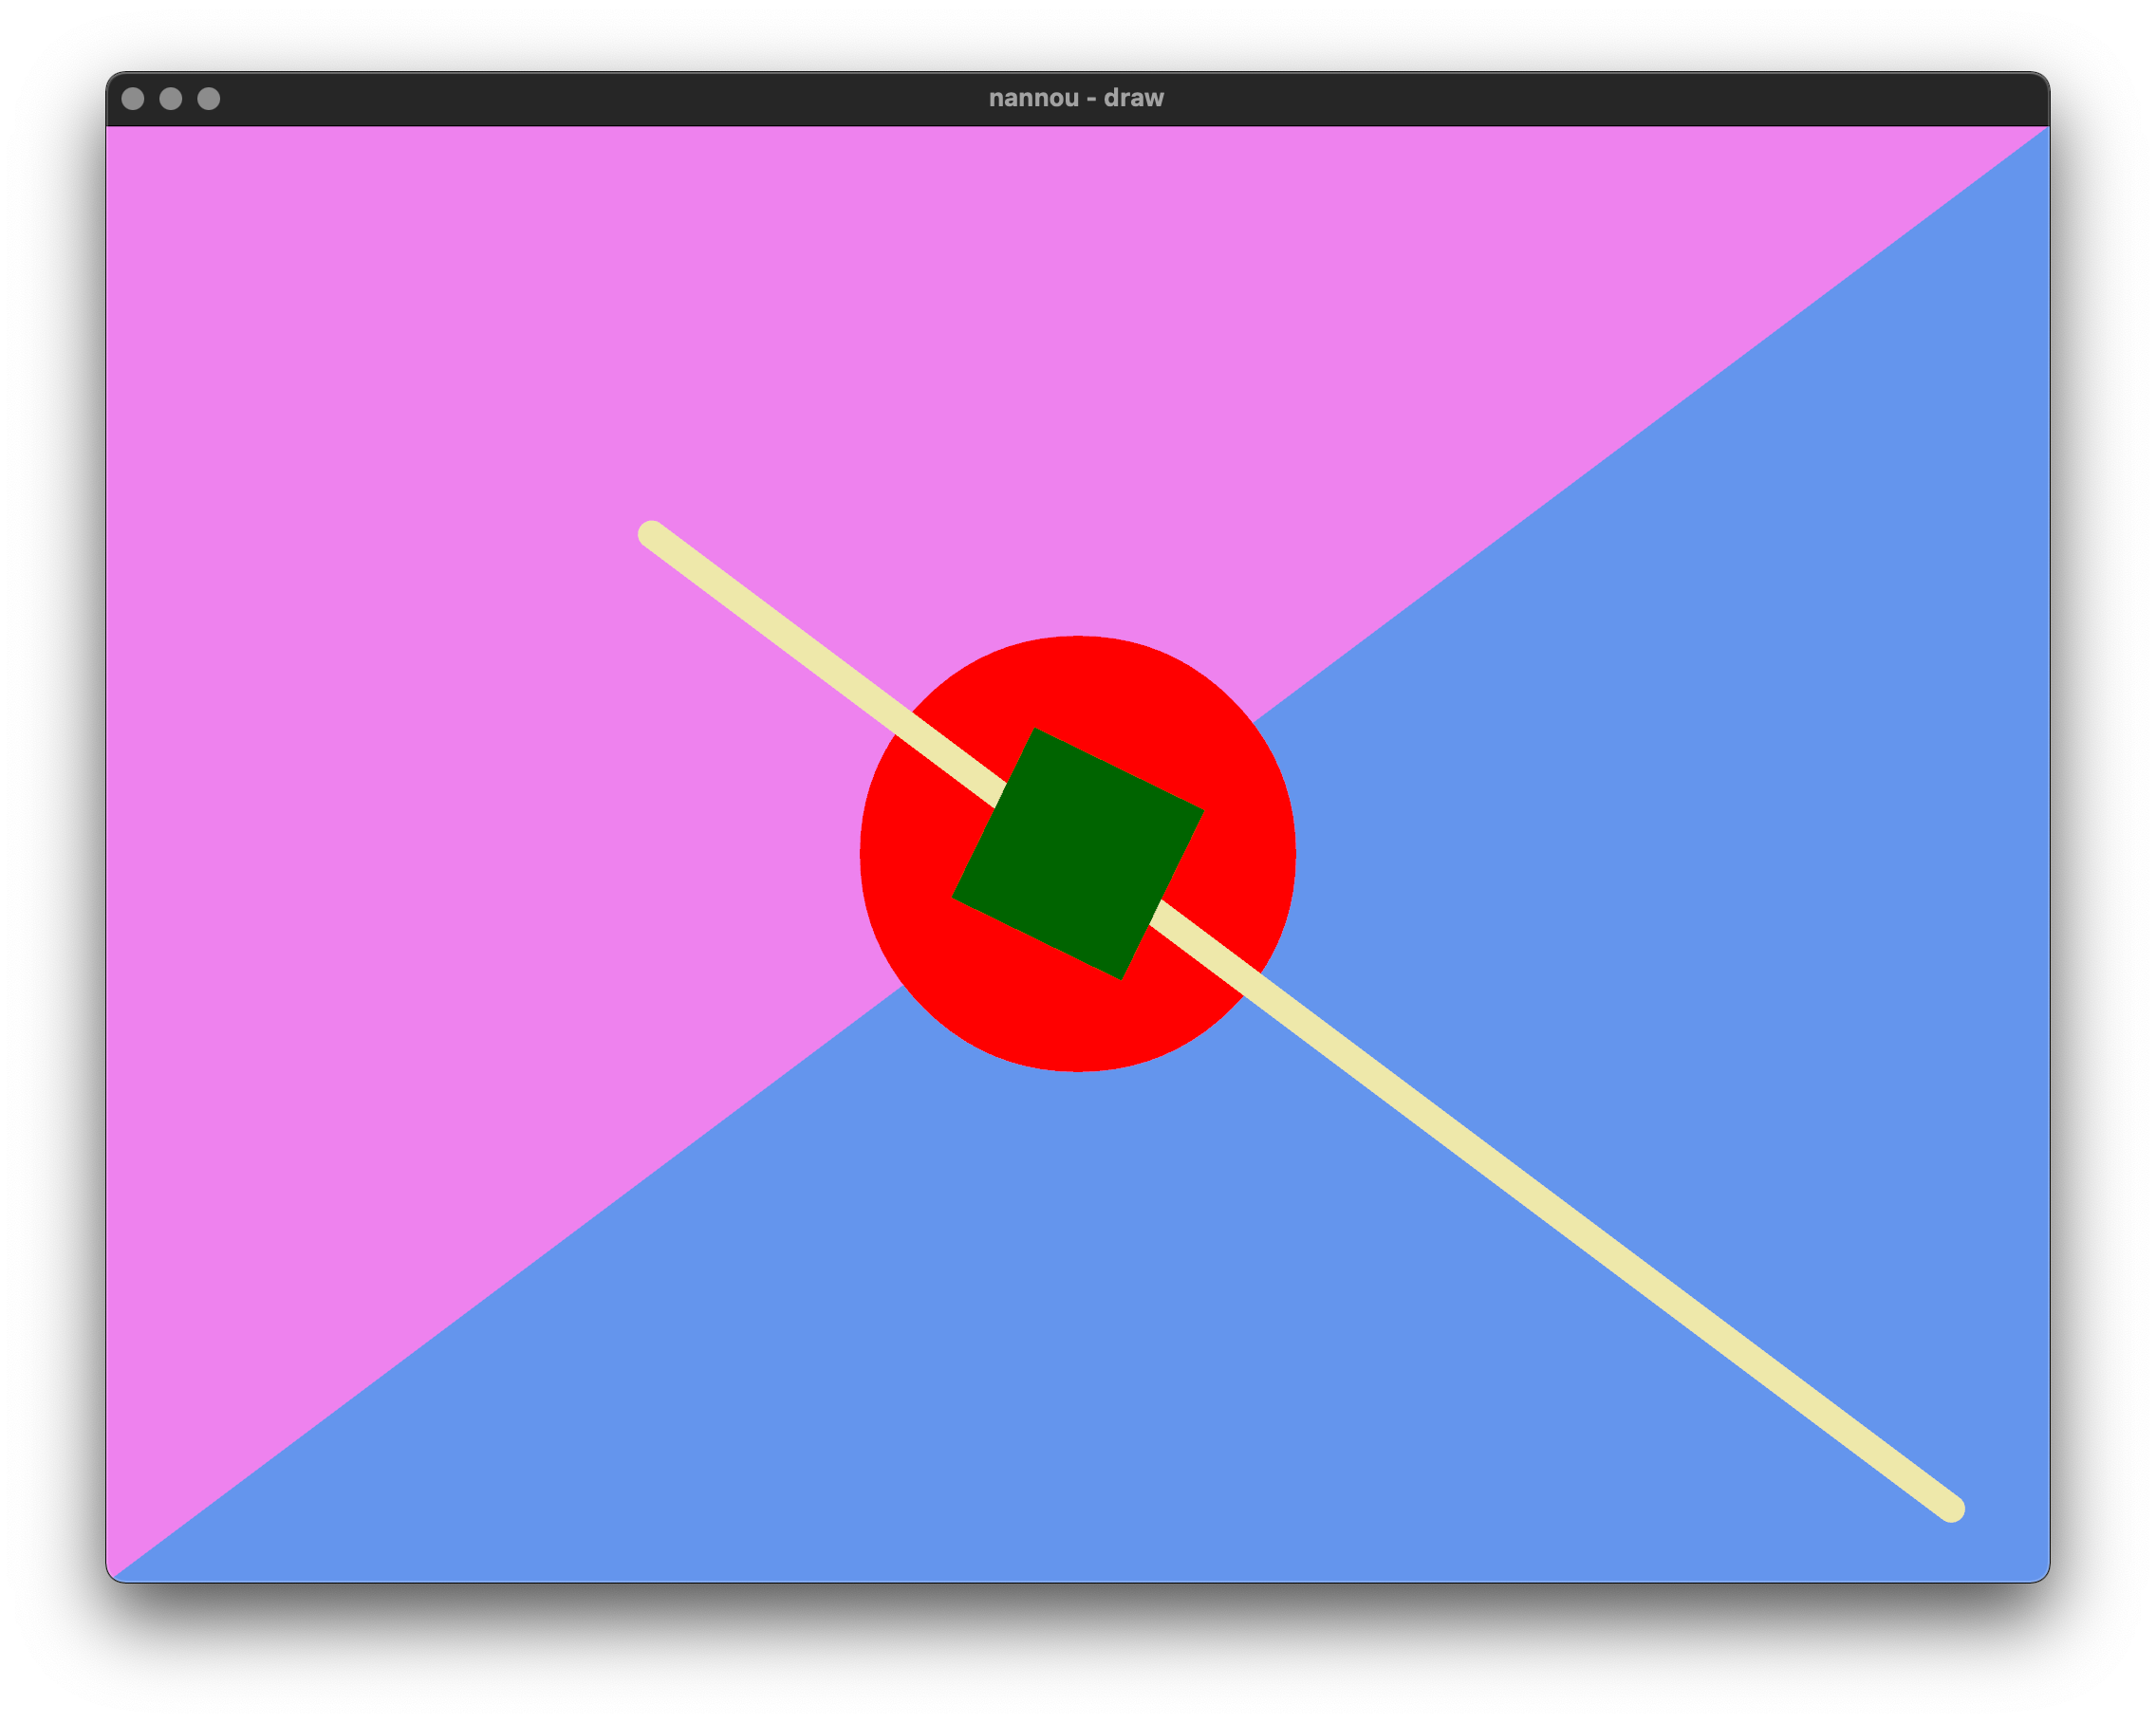
cargo run --release --example draw
The line above will compile and run the draw example.
To know more about running the examples, there’s the Running Example section in the Nannou guide.
Useful Resources
-
An interesting repository with some nice examples available on Github.
-
A website containing some astonishing examples is GuruBlog. The author also shared the source code, and the outcome is fascinating. My favorite is the particle experiment the really gives the idea of what can be done by Nannou.
-
Alexis André released a YouTube video where he presented some of the basics to learn creative coding with Nannou.
-
A presentation by Tom Gowan of the Nannou framework that makes it easy for artists to express themselves with simple, fast, reliable, portable code.
Nannou Experiments
It’s finally the time to get my feet wet with the Nannou framework and try to create something nice 😀. The initial scaffolding can be done in several ways. I ended up creating different members in a Carbo workspace, but let’s set this aside for now, and let’s stick to something simpler.
- Create a new binary project typing
cargo new --bin example1. - Enter the
example1directory, and include the Nannou dependency by adding the linenannou = "0.15"after the[dependencies]entry in theCargo.tomlfile. - Copy the template to the
src/main.rsfile. - Compile the application using
cargo run --release.
The Nannou “Hello World” project is ready now! I used this configuration initially as my main starting point to play with the Nannou function, and at the same time browsed all the examples to learn some of the basics. I was extremely proud of two productions even though they were heavily based on the initial implementation from the GuruBlog.
Example 1
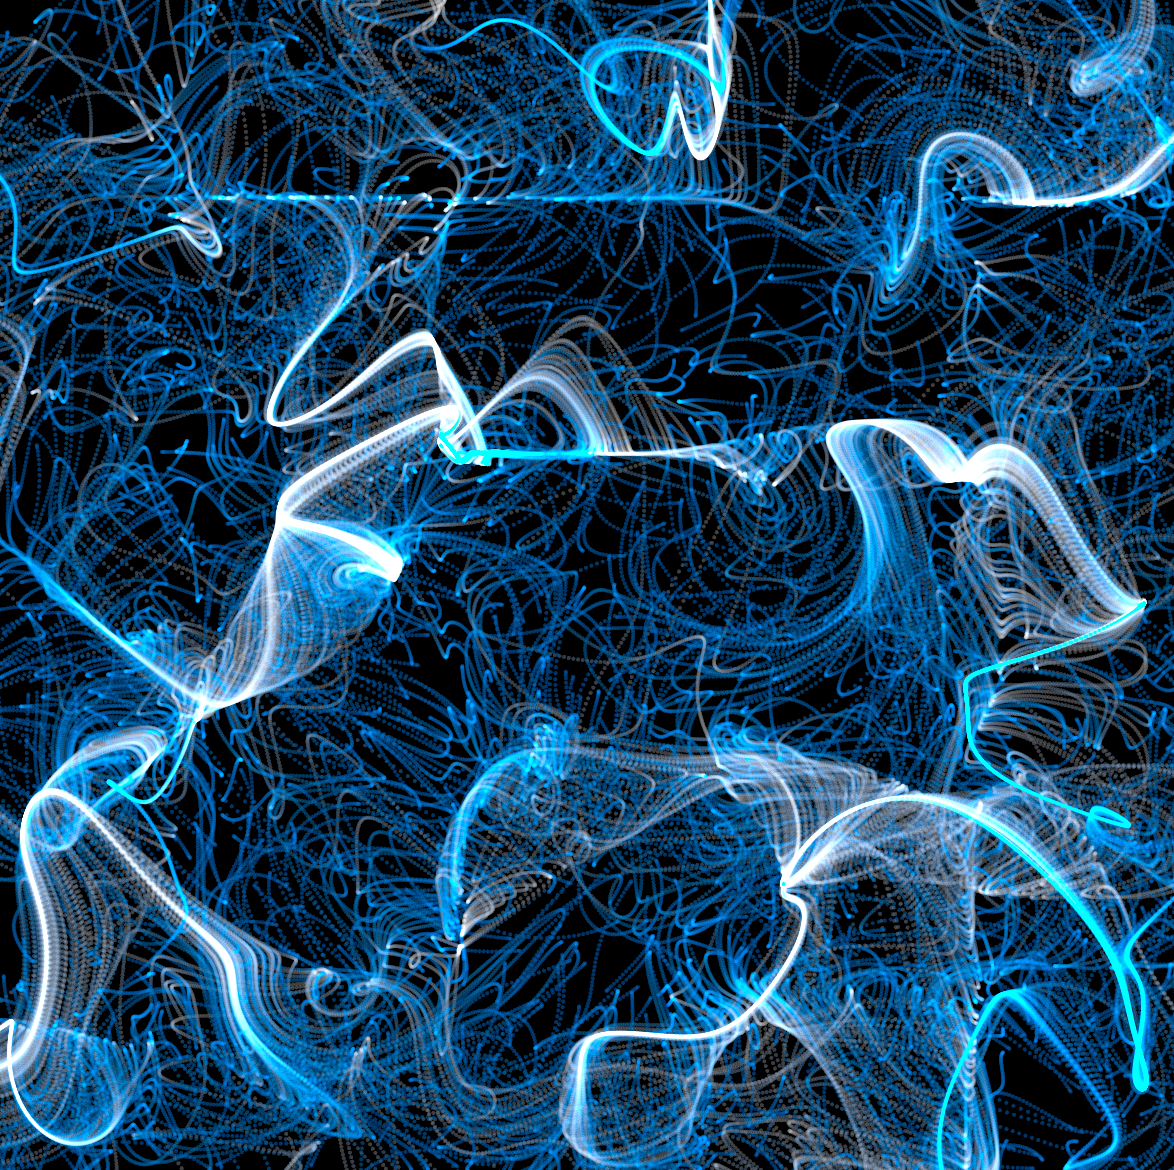
// Heavily inspired from https://www.local-guru.net/blog/2020/12/24/nannou-experiment---particles

use nannou::noise::NoiseFn;
use nannou::rand::*;
use nannou::prelude::*;

const CAPTURE: bool = false;

fn main() {
    nannou::app(model)
        .update(update)
        .run();
}

struct Particle {
    pos: Vector2,
    vel: Vector2,
}

impl Particle {
    fn new(x:f32, y:f32) -> Particle {
        Particle {
            pos: vec2(x,y),
            vel: vec2(0.,0.),
        }
    }

    fn update(&mut self, dir: Vector2) {
        self.pos += self.vel;
        self.vel += dir;
        self.vel *= 0.8;
    }
}


struct Model {
    particles: Vec<Particle>
}

fn model(app: &App) -> Model {
    app.new_window().size(600,600).view(view).build().unwrap();

    let r = app.window_rect().right() as f32;
    let l = app.window_rect().left() as f32;

    let w = l - r;
    let t = app.window_rect().top() as f32;
    let b = app.window_rect().bottom() as f32;

    let h = t - b;

    let mut p = vec![];
    for _i in 0..2000 {
        let x = random_f32() * w + r;
        let y = random_f32() * h + b;
        p.push(Particle::new(x,y));
    }

    Model{
        particles: p
    }
}

fn update(app: &App, model: &mut Model, _update:Update) {
    let noise = nannou::noise::Perlin::new();
    let t = app.elapsed_frames() as f64/ 100.;
    for i in 0..model.particles.len() {
        let p = &mut model.particles[i];
        let x = noise.get([ p.pos.x as f64 / 128., p.pos.y as f64 / 137., t + i as f64/ 1000. ]);
        let y = noise.get([ -p.pos.y as f64 / 128., p.pos.x as f64 / 137., t + i as f64/ 1000. ]);

        let a = vec2(x as f32, y as f32);
        p.update(a);
    }
}

fn view( app: &App, model: &Model, frame: Frame){
    let draw = app.draw();
    let t = (app.elapsed_frames() as f32) * 0.02;
    let w = (t * 0.832).cos();
    for p in &model.particles {
        draw.ellipse().xy(p.pos).w_h(2.0, 2.0).color(hsla(0.1,1. + w,5.,0.01));
    }
    draw.to_frame(app, &frame).unwrap();
    if CAPTURE {
        let file_path = captured_frame_path(app, &frame);
        app.main_window().capture_frame(file_path);
    }
}

fn captured_frame_path(app: &App, frame: &Frame) -> std::path::PathBuf {
    app.project_path()
        .expect("failed to locate `project_path`")
        .join("frames")
        .join(format!("{:04}", frame.nth()))
        .with_extension("png")
}
Example 2
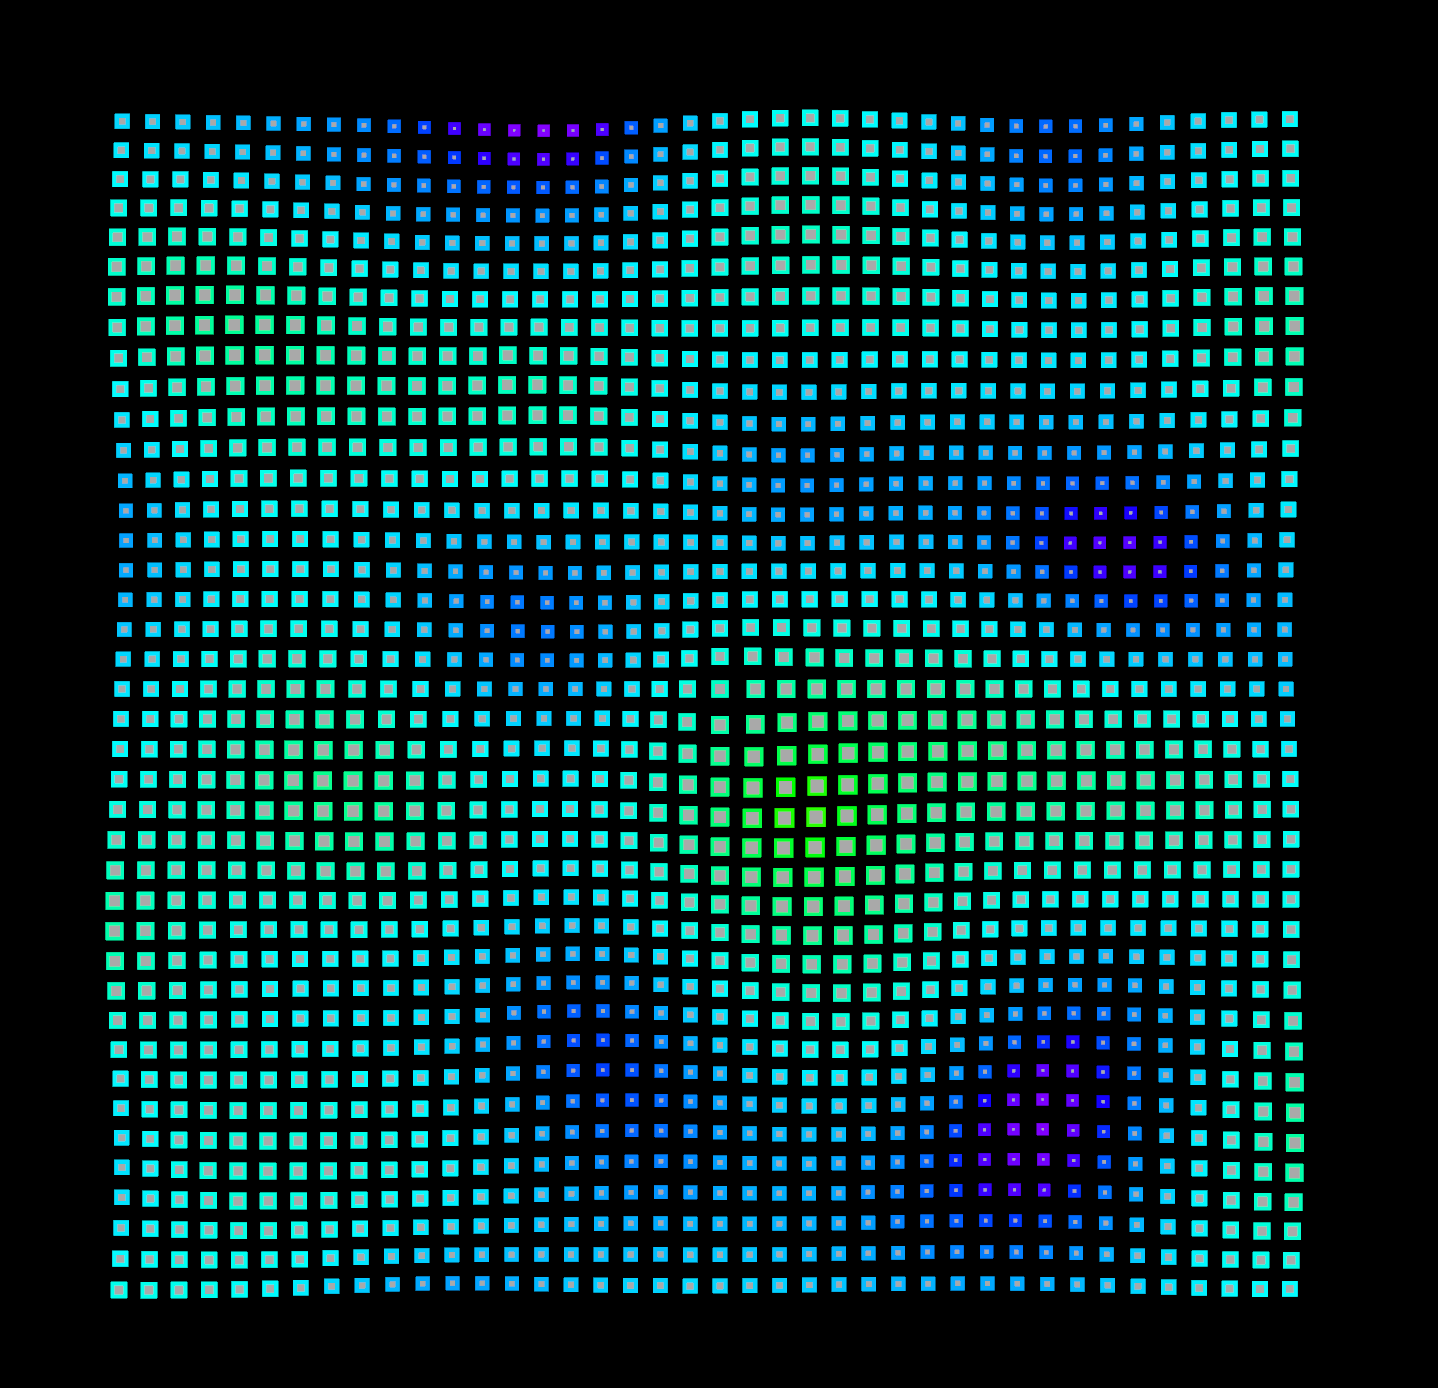
//Heavily inspired from https://www.local-guru.net/blog/2020/12/22/nannou-experiment-no2---perlin-noise
use nannou::noise::NoiseFn;
use nannou::prelude::*;

const CAPTURE: bool = false;

fn main() {
    nannou::app(model)
        .update(update)
        .run();
}

struct Model {
    points: Vec<Vector3>,
    noise: nannou::noise::OpenSimplex,
}

fn model(app: &App) -> Model {
    app.new_window().size(900,900).view(view).build().unwrap();
    let mut p = vec![];
    for x in -20..20 {
        for y in -20..20 {
            p.push(vec3(x as f32, y as f32, 0.0));
        }
    }
    let noise = nannou::noise::OpenSimplex::new();
    Model { points: p, noise: noise, }
}

fn update(app: &App, model: &mut Model, _update: Update) {
    let t = (app.elapsed_frames() as f32) * 0.015;
    let mut pn = vec![];

    for p in &model.points {
        let r = model.noise.get([p.x as f64/10.0, p.y as f64/10.0, t as f64]);
        pn.push(vec3(p.x,p.y,r as f32));
    }
    model.points = pn;
}

fn view(app: &App, model: &Model, frame: Frame) {
    frame.clear(BLACK);
    let draw = app.draw();
    for point in &model.points {
        let d = vec2(point.x, point.y).normalize();
        let r = point.z * 6.0 + 6.0;
        let p = vec2(point.x, point.y)*15.0 + d * point.z * 15.0;
        draw.rect()
            .x_y(p.x, p.y)
            .w_h(r,r)
            .color(DARKGREY)
            .stroke(hsl(1.0 - point.z as f32/2.0+0.5,1.0,0.5))
            .stroke_weight(2.0 - point.z);
        // draw.rect()
        // .w(p.x + r)
        // .h(p.y + r )
        // .color(DARKGREY)
        // .stroke(hsl(1.0 - point.z as f32/2.0+0.5,1.0,0.5))
        // .stroke_weight(2.0);
    }
    draw.to_frame(app, &frame).unwrap();

    if CAPTURE {
        let file_path = captured_frame_path(app, &frame);
        app.main_window().capture_frame(file_path);
    }
}

fn captured_frame_path(app: &App, frame: &Frame) -> std::path::PathBuf {
    app.project_path()
        .expect("failed to locate `project_path`")
        .join("frames")
        .join(format!("{:04}", frame.nth()))
        .with_extension("png")
}
Conclusion
Nannou is great for quickly creating astonishing graphic effect.
It’s fast, well documented and written in Rust, a language that I’ve always wanted to try 😀.
Do you have questions, or suggestions?
Ping me on Twitter @simonarpe and let’s talk!